


Introduction:
WebSphere® Adapter for JDBC, you can create integrated applications that can interact and exchange of information with a database. By using the adapter, an application can send requests to the database, as well as receive events from the database, often without the need for SQL code.
The adapter enables two-way communication between an application running on WebSphere Process Server or WebSphere Enterprise Service Bus and a database. Using the adapter, an application can send requests to read, create, modify, or delete data in a database, in many cases without writing any SQL code.
The adapter supports integration of databases that are accessible through the JDBC application programming interface (API) with applications running on WebSphere Process Server or WebSphere Enterprise Service Bus. The adapter provides outbound and inbound processing under the Java 2 Platform, Enterprise Edition (J2EE) Connector Architecture (JCA) and integrates with Service Component Architecture (SCA) components.
Outboundprocessing enables an application to access or modify data in a database. The adapter converts a request from the application to an outbound operation, which it runs to create, retrieve, update, or delete data in the database or to run a database program stored in the database. Processing these requests results in the creation, retrieval, update, or deletion of rows in the corresponding database tables.
The adapter also enables you to run stored procedures or stored functions that are defined in the database, and to run user-defined SELECT, INSERT, UPDATE, and DELETE statements. You can use the adapter to integrate multiple applications with the same database.
Overview:
An application running in WebSphere Process Server or WebSphere Enterprise Service Bus invokes a service in an outbound module, which sends a request to the adapter to process one or more business objects. The adapter uses the JDBC API to connect to the database server, which accesses the tables and other objects in the database.
Here we are going to insert, update, and delete rows from OrderInfo table by using JDBC adapter.

Software Requirements:
- WebSphere Integration Developer version 7.0.0.0
- WebSphere Process Server version 7.0.0.0
- WebSphere Adapter for JDBC version 7.0.0.0
- JDBC Driver for Oracle.
- Oracle 10g.
Implementation:
The following activities need to complete for implement outbound adapter using IBM WPS.
- Create tables.
- Create an authentication alias
- Create a data source
- Implement JDBC outbound Adapter
- Implement Module.
- Test the application.
Create table:
We must create the following OrderInfo in the Oracle database before starting the scenario.
CREATE TABLE ORDERINFO ( ORDERID VARCHAR2(10) NOT NULL PRIMARY KEY,ORDERNAME VARCHAR2(10) ,
CUSTOMERNAME VARCHAR2(20) ,
ADDRESS VARCHAR2(20) ,
STATUS VARCHAR2(15),
ORDERDATE TIMESTAMP(6),
STATUSUPDATE TIMESTAMP(6)) ;

The table format will be look like below.

Create an authentication alias:
The authentication alias needs to be set because the data source that is used to generate artifacts will use the username and password set in the authentication alias to connect to the database.
Follow these steps to set the authentication alias in the WebSphere Process Server administrative console.
Start the server, log into admin consol. Select Security àGlobal Security.
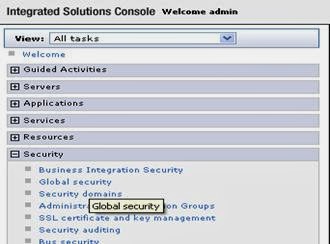
On the right, click J2C Authentication Data under Java Authentication and Authorization Service.

Click New to create a new authentication entry. Type the alias name, and username and password to connect to the database. Click OK
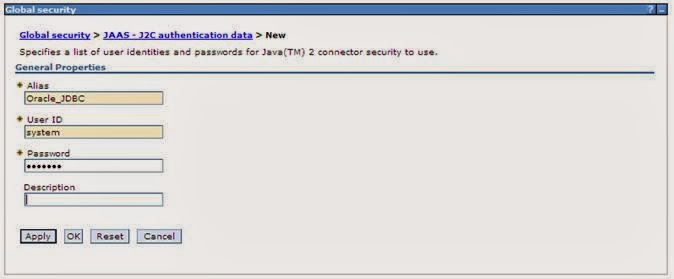
Click Save to save the changes.

Create the data source:
Create a data source in WebSphere Process Server, which the adapter will use to connect to the database. This data source will be used later when generating the artifacts for the module.
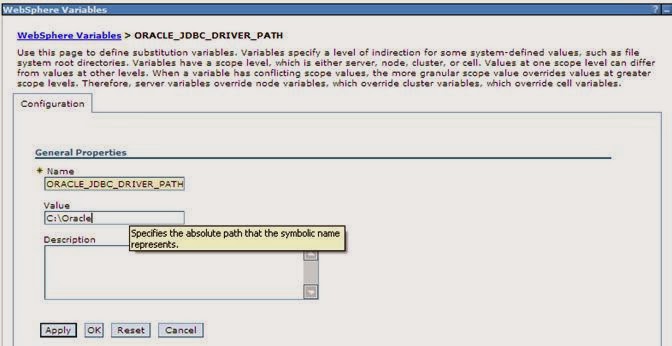
In the administrative console, select Environment àWebSphereVariables.

On the right, click ORACLE_JDBC_DRIVER_PATH and specify the path of the ojdbc6.jar file in the Value field. Click OK.
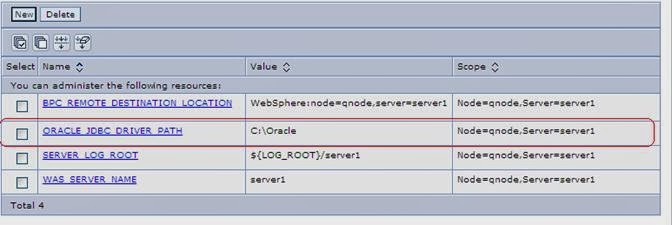
Click Save to save the changes. The variable is added and appears in the list.
Select Resources à JDBC àJDBC Providers.

Click New in the JDBC provider’s window. In the Create new JDBC provider page, select an Oracle database with a XA data source for the Oracle JDBC driver. Click Next.

In the Enter database class path information page, enter the following value in the Class path field:
$(ORACLE_JDBC_DRIVER_PATH)/ojdbc6.jar, where
$(ORACLE_JDBC_DRIVER_PATH) is library path for the run time.
Then click on next.

Then click on finish and save the changes.

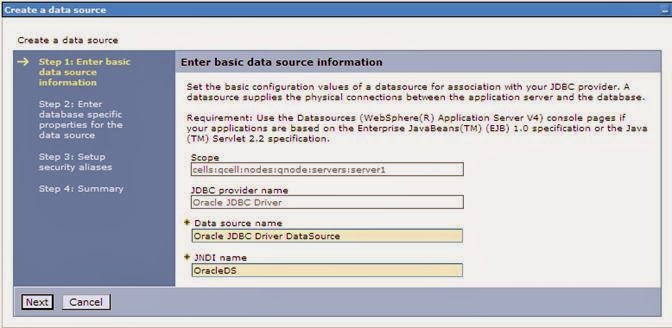
Click the Oracle JDBC provider you just created. Under Additional Properties, click Data sources. Click New.

Type any value in the JNDI name field, and select the authentication alias. Click Next.
Provide the appropriate URL value and select a data store helper class name from the Data store helper class name list as shown in the following figure. Click Next.

Select the authentication alias you just created from the Component-managed authentication alias list, and click Next.

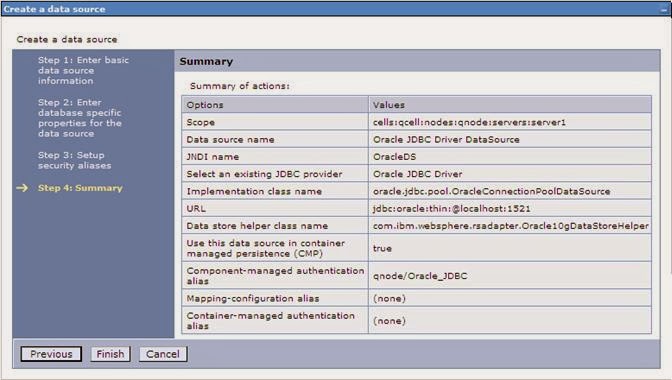
The Summary of the values entered for the data source is displayed. Click Finish.
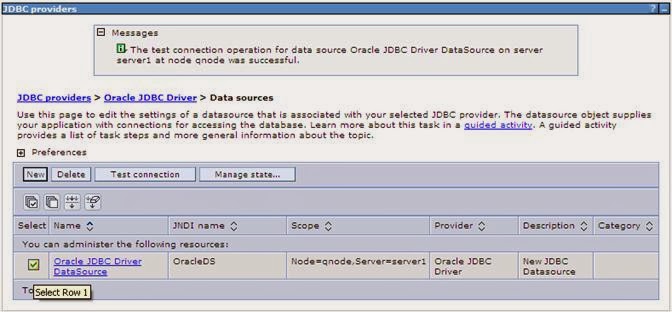
Click Save to save the changes. Select the check box corresponding to the data source you created in the previous step and click Test connection.
Implement JDBC outbound Adapter:
Switch to the Business Integration Perspective in WebSphere Integration Developer by selecting Window -> Open Perspective Business Integration.
Start the external service wizard by selecting File-> New –> External Service.
In the Available Types area, select Adapters > JDBC and then click Next.

Select the IBM WebSphere Adapter for JDBC (IBM: 7.0.0.0) and click Next.

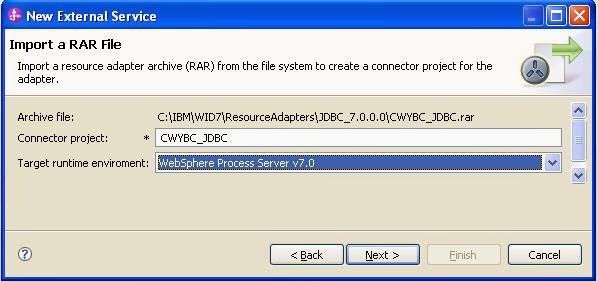
In the Connector project field enter CWYBC_JDBC, and in the Target runtime environment field, select the WebSphere Process Server v7.0 runtime. Click Next.
In the JDBC driver JAR files field, click Add, to add the JDBC driver class to connect to the database. Browse to select the driver JAR file and click Next.

Select Outbound and click Next.

Set connection properties for the external service wizard
To connect to the Oracle database:
- Expand the Oracle node from Database system connection information then select 10.
- Enter System ID, Host name, Port number, User name and Password fields, and then click Next.

Select the business objects to be used with the adapter
Follow these steps to select the OrderInfo business object:
In the Find Objects in Enterprise System window, click Edit Query.
1. In the Specify the Query Properties window, select the Prompt for additional configuration settings when adding business objects check box and click OK.
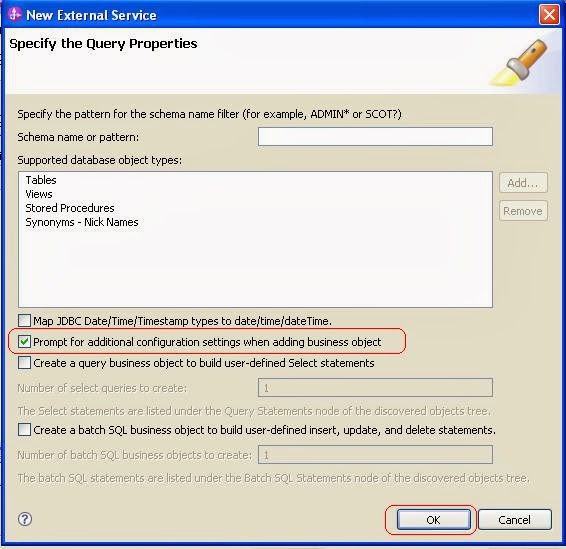
Click Run Query.

Expand the SYSTEM (for this tutorial only) node, select Tables and expand it.

Select the ORDERINFO table and click >
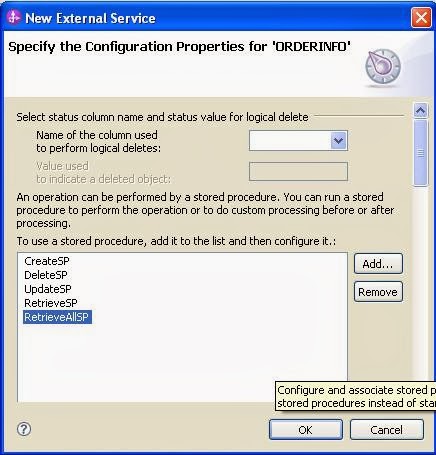
Click on Next.
Generating business object definitions and related artifacts follow these steps to generate the business object definitions. In the Specify Composite Properties window, accept the default values for all fields and click Next.

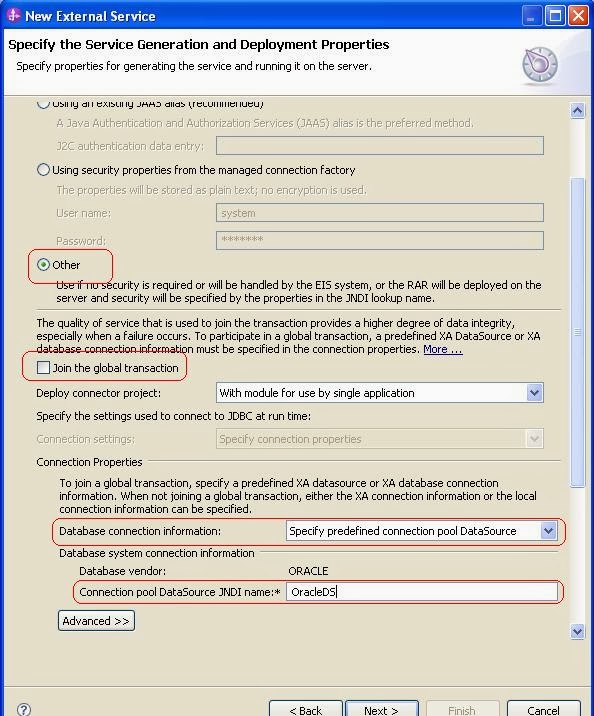
In the Specify the Service Generation and Deployment window, perform the following steps:
a) Select Other for security options under Deployment Properties.
b) Clear the Join the global transaction check box.
c) Select Specify predefined connection pool DataSource from the Database connection information list.
d) Enter OracleDSin the Connection pool DataSource JNDI Name field, and click Next.
Click New in the Specify the Location Properties window. In the Select a Business Integration Project Type window, select Module and click Next. Then click on finish.

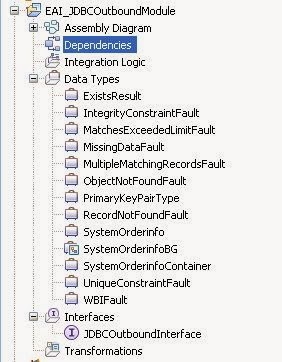
Expand the created Business Integration Project and verify whether the artifacts are generated correctly.
Implement Module:
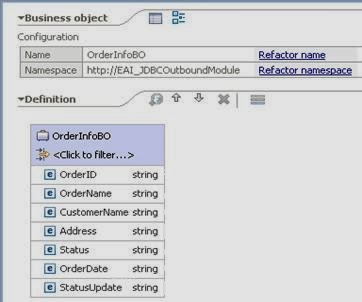
Create a Business Object called ‘OrderInfoBO’ under ‘EAI_JDBCOutboundModule’.
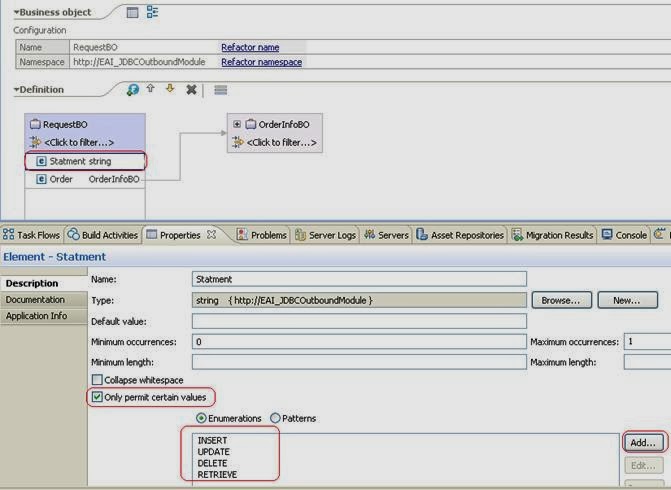
Create a Business Object called ‘RequestBO’ as shown below.
Create an Interface called ‘OrderService’ under ‘EAI_JDBCOutboundModule’.

Create a Business Process called ‘BP_OrderProcess’ and implement look like below.

Drag and drop the BP_OrderProcesss to Assembly diagram, map with ‘JDBCOutboundInterface’ import and export as Web Service. It should be look like below.

Test the application:
Now we have completed implementation of JDBC adapter, and module. We need to test the application and need to verify the Data base.
Deploy the ‘EAI_JDBCOutboundModule’ into WebSphere Process Server.
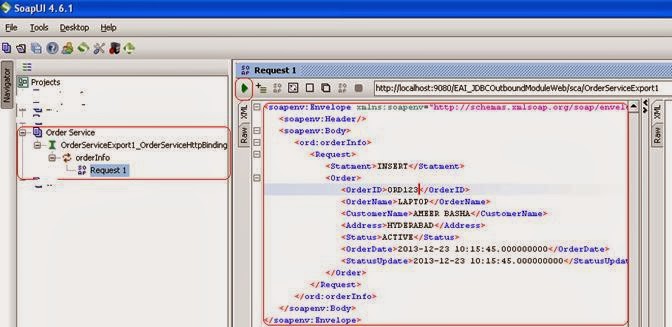
Create a Project in SOAP UI and import WSDL file. Expand the WSDL file and OrderInfo Request1. Enter the input as shown below and click on submit request.
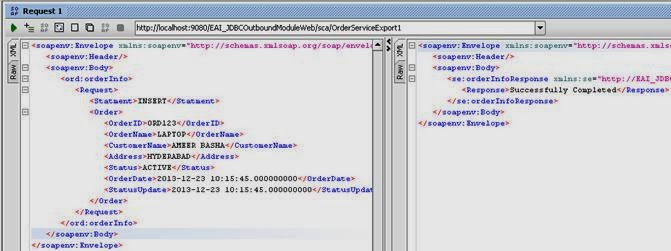
We have tested for INSERT into OrderInfo table. We have got the below response from application.
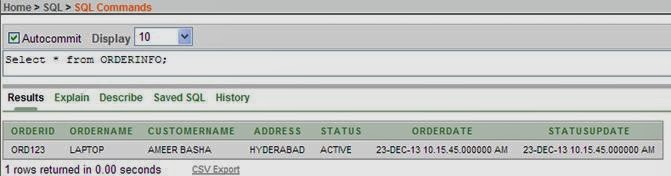
We have to validate the insertion happened into OrderInfo table or not. Now log into Oracle DB and run the following Query.
Select * from ORDERINFO;
We can see there will be one row inserted into Orderinfo table.
Similar way we can test for update, delete and retrieve data from OrderInfo table.
Conclusion:
Here we learnt how to implement an outbound adapter and the usage of outbound adapter. The adapter enables two-way communication between an application running on WebSphere Process Server or WebSphere Enterprise Service Bus and a database. Using the adapter, we can to read, create, modify, or delete data in a database. The adapter also enables you to run stored procedures or stored functions that are defined in the database, and to run user-defined SELECT, INSERT, UPDATE, and DELETE statements. You can use the adapter to integrate multiple applications with the same database.
Downloads:
File Name | Description | Size | Download |
JDBC Adapter.zip | Sample JDBC Outbound Adapter implementation | 28 KB | |
JDBC Outbound Adapter.pdf | JDBC Outbound Adapter in WPS | 850 KB |


